Behind the scenes with the Zambart lab’s principal STAR scientist
By Loveness Mukaka, Laboratory Scientist – December 2016
Although Zambia has made much progress in providing access to HIV testing services, approximately 40% of Zambians have never tested for HIV. There still remain a number of barriers to accessing currently available HIV testing services, including structural barriers, such as the costs of going to a health facility, and individual barriers, such as a fear of a lack of confidentiality of testing, and a low perceived risk of HIV infection.
Self-testing for HIV has the potential to address these barriers, and so the STAR project’s clinical performance study in Zambia aims to add to the evidence base on the acceptability, feasibility, accuracy and effectiveness of HIV self-testing delivery strategies for Zambia, using the OraQuick® HIV self-test kits.
The field staff work with participants in the community. To test for HIV, the OraQuick® devices are swabbed in the participant’s mouth, collecting a few skin cells and saliva, and the participant then waits for 20 minutes before reading the results. If the device shows one band on the control line, the participant is HIV negative, but if two bands appear on both the control and the test, then the participant is HIV positive.
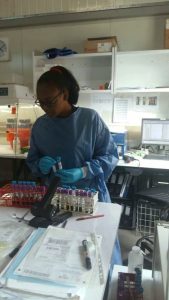
The field staff arrive at the lab with two OraQuick® devices from each study participant – one which has been used by the participant to test themselves, and the other which has been used on the participant by the Research Assistant as a comparison. The field staff also provide a 10ml sample of blood from the participant for detailed testing. The blood is processed in the lab and a corresponding amount of plasma is harvested from the blood and then stored at -80 degrees to await testing by a more specific and sensitive machine, which will give us a true result of the sample (participant), i.e. whether it is a true negative or a true positive. All of this is done to prove the validity and effectiveness of the results given by the OraQuick® devices, as this is what the study has been designed to discover.
BRIEF SELF DESCRIPTION
NAME: Loveness Mukuka
TITLE: Laboratory Scientist
I’m responsible for receiving and processing STAR specimens, though I help out in the PopART study as well. Apart from HIV specimen preparation and testing I help out in the TB laboratory with the GenXpert testing and staining. I also help out with the CD4 counts and the Quantiferon assay.
MAIN RESPONSIBILITIES IN THE LAB:
- Samples arrive from the field with field stuff (research nurses).
- Reception of samples by the lab scientist:
- Receive samples and check volume.
- Check if bag contains two OraQuick® devices.
- Give each sample tube corresponding falcon tubes with the same barcode.
- Fill in the transportation form with the appropriate information.
- Prepare three aliquot tubes for each sample:
- HIV Architect testing (tube 1)
- Bio-Rad testing (tube 2)
- Viral Load Testing (tube 3)
- Label the three tubes with appropriate barcodes.
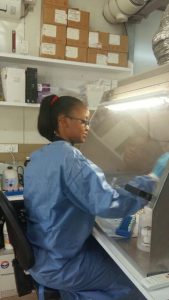
- Place sample tubes into the centrifuge and centrifuge for 10 minutes at 800g.
- After centrifuging is done, get sample tubes and transfer plasma into corresponding 10ml conical tubes.
- Place conical tubes in the centrifuge and centrifuge once again at 800g for 10 minutes.
- Transfer plasma after the last spin into the corresponding three aliquot tubes – 0.25ml in tube 1, 1 ml in tube 2 and 1 ml in tube 3. If the conical tube is still left with some plasma after the transfer, then fill tubes 2 and 3 to the brim and pour the rest into tube 1.
- Store in corresponding storage boxes and then store in a -80 degree freezer awaiting testing.
- When the boxes are full:
- Perform HIV testing using the Abbott Architect i2000SR.
- Perform ELISA testing using Bio-Rad to confirm Architect results.